' href='data:image/webp;base64,UklGRgwBAABXRUJQVlA4IAABAADwBQCdASogACAAPqlEnkmmJCMhMAwAwBUJbACsMy/vXzMh7/vKf8ILT4nvItfdnntQNE4mKu2gAAD+83Jq/P+aOh38vhb43XCUGLT/Innp3mN2H2JzPmgLGZA1orkuCPzxrautb3EsxntGio5v/iHPkEft30Ue9wMvmSrnjGCKBubYL+E0CDXnAAntOviniIdmXWsln5K/M5hryUF+tSb/YkKTV6llkkmxCXFpGvAM6W5QsMUrPdPjAwv5QNWqhTn8E5JjNYRRd95YMV6Dt2lfnwHbmRq/d64x0i3JGAEPyYDJ2KKC7U3bnRY4FM4J9+1Nee+/peU/b/YnSsSSoAAA'/%3E%3C/svg%3E)

Perfect Skin Is a Myth. A Great Photo Isn’t
Skincare and the science behind it have come a long way in the past decade. We now have science-backed ingredients and treatments that wouldn’t have been nearly as accessible back when the year started with 201… and a number between 0 and 5. And yet, pimples still pop up uninvited. Redness, rosacea, blackheads, and the occasional breakout are all part of having real skin. And that’s fine. Perfectly, completely normal, fine. Because the myth of flawless skin is exactly that: a myth.
Table of Contents
- In Defense of Retouching the Occasional Pimple
- Get K-Pop-Worthy Skin With FaceApp’s Skin Filters
- Combine Skin Filters Because They’re Better Together
- How to Edit Skin in FaceApp
- FAQs
In Defense of Retouching the Occasional Pimple
Even the influencers whose lives we follow religiously deal with pores, blemishes, acne, and bad skin days. Sure, they know one or two flattering light tricks, but the little help from their friends at FaceApp doesn’t hurt, either.
Don’t get us wrong: we are all for embracing the skin we’re in, but we also understand the desire to have that one photo where an unexpected pimple isn’t stealing the spotlight. There’s nothing wrong with loving your skin and wanting to give it a little help on camera.
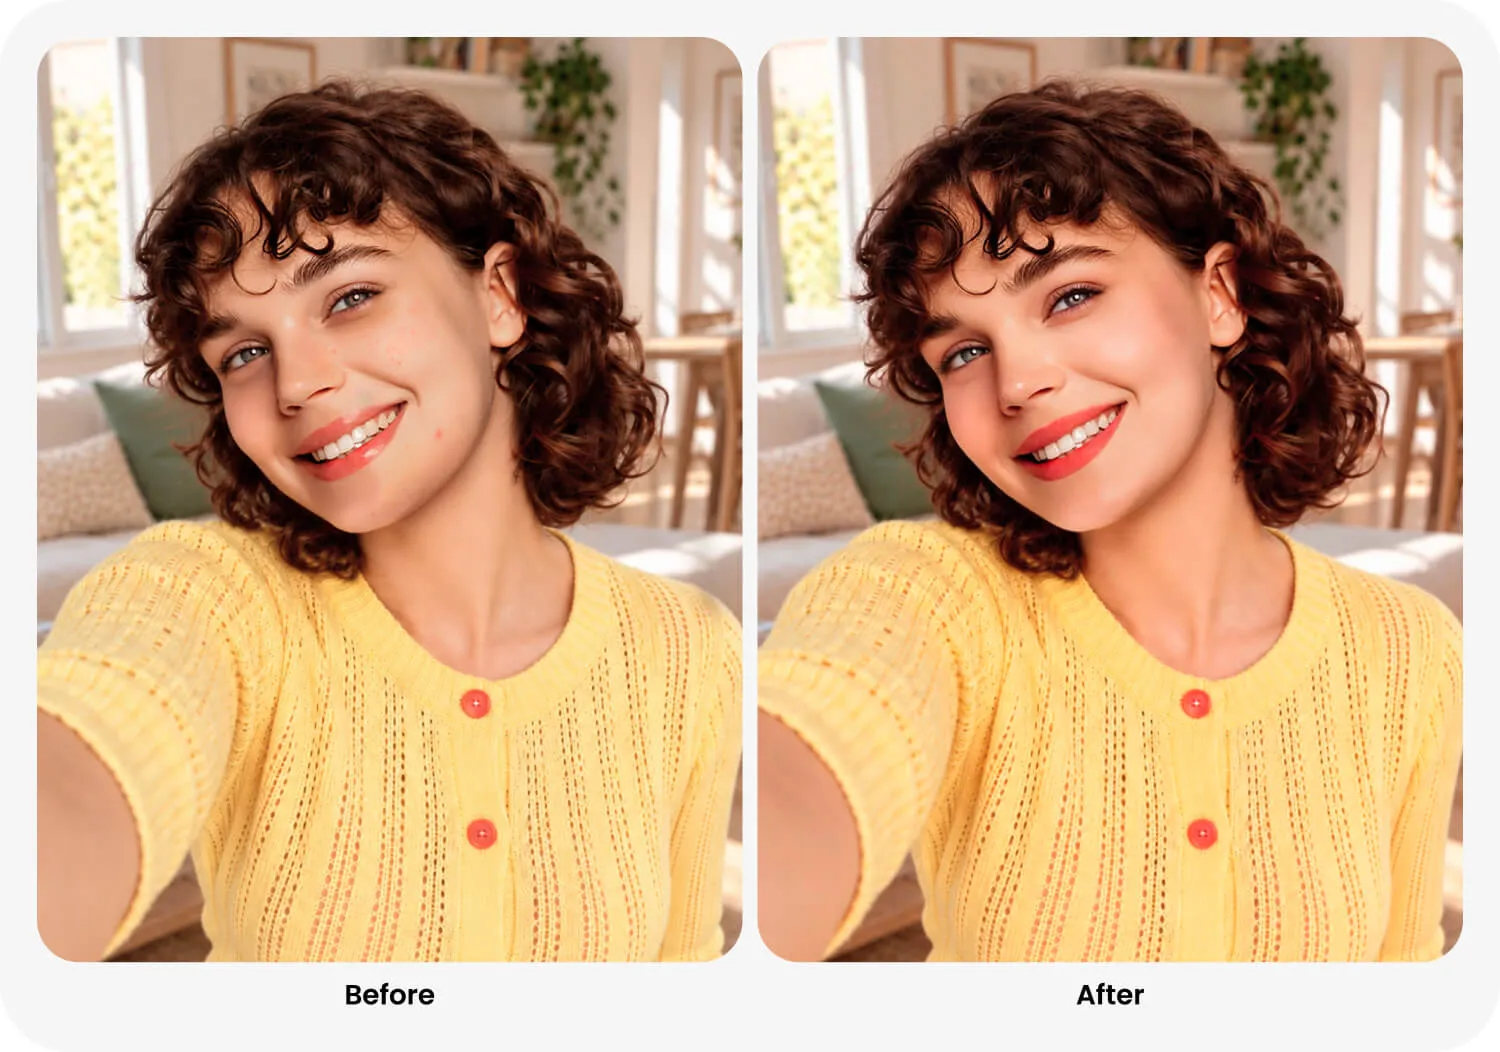
That’s precisely why we developed FaceApp’s Skin filters. They’re here to soften the appearance of the blemishes that annoy you and tone down redness, but ultimately give your photos that model- or influencer-worthy finish, all without losing the features that make your face yours.
Get K-Pop-Worthy Skin With FaceApp’s Skin Filters
K-pop idols have set the bar for picture-perfect skin pretty sky-high. So high, in fact, that when NCT 127 appeared in an unretouched photoshoot showing their actual pores, blemishes, and skin texture, it made headlines. So, you’re telling us K-pop stars have pores? Really? How human.
And while HYBE is still holding auditions for its next generation of K-pop stars, do not sign up for eight hours of dance rehearsals to get that K-pop-worthy complexion in your photos. Get your phone and open up the FaceApp Skin filter, and use restraint for the highest intensity. Unless it’s for fun. In that case, do everything at the highest setting.
Inside the Skin folder, you’ll find Smooth, Tan, No Eyebags, Fresh, Clear, Glowing, Bright, Freckles, Unwrinkled, and Matte. There’s also Laser, available in the female version.
The names are fairly self-explanatory, but here’s a little cheat sheet.
Smooth softens uneven texture, giving your complexion that freshly exfoliated look, sans the involvement of any chemical exfoliants or expensive treatments.
Clear helps minimize the appearance of blemishes, and this writer’s favorite setting is five for that perfect, angelic-almost look.
No Eyebags gives tired-looking eyes a little time off, delivering in a single tap what your caffeine-infused eye creams have been promising you for weeks.
Glowing brings the radiance, and since you can adjust the filter’s strength, you get to decide whether you’re going for a healthy glow or looking like the sun’s been glowing too hard on your face that day. But do play with it, it’s so much fun.
Matte takes care of unwanted shine, especially when your forehead has decided to reflect every single light source in the room.
Tan adds a little sun-kissed warmth to your complexion, even if the closest you’ve come to a tropical getaway lately is scrolling through someone else’s vacation photos.
Freckles lets you sprinkle on a few of those coveted little spots, no sun exposure required.
Combine Skin Filters Because They’re Better Together
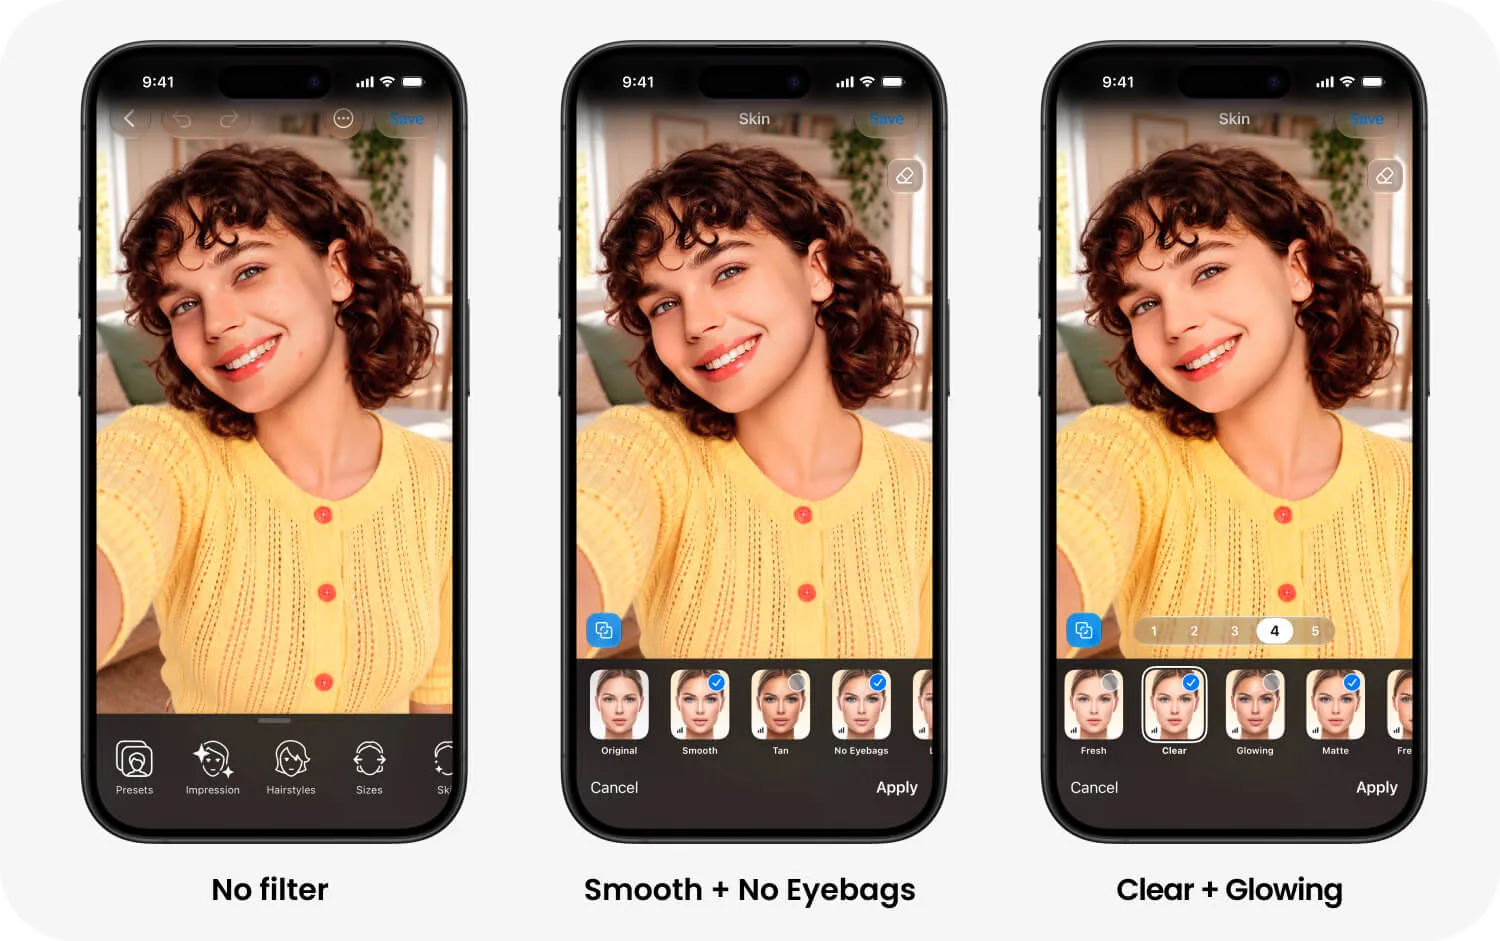
Just kidding, they’re excellent on their own. But FaceApp’s Skin filters play well together, and thanks to the multiselect feature, you can combine several in a single edit.
Tap the little icon in the bottom-left corner to activate multiselect, then pick your favorites.
For that K-pop-idol complexion, pair Smooth + Glowing. No Eyebags + Fresh will help you look like you got your full eight hours, even if your sleep tracker has evidence to the contrary. Clear + Matte can help tone down the appearance of blemishes and unwanted shine.
How to Edit Skin in FaceApp
Here’s how to give your skin a camera-ready look in just a few taps.
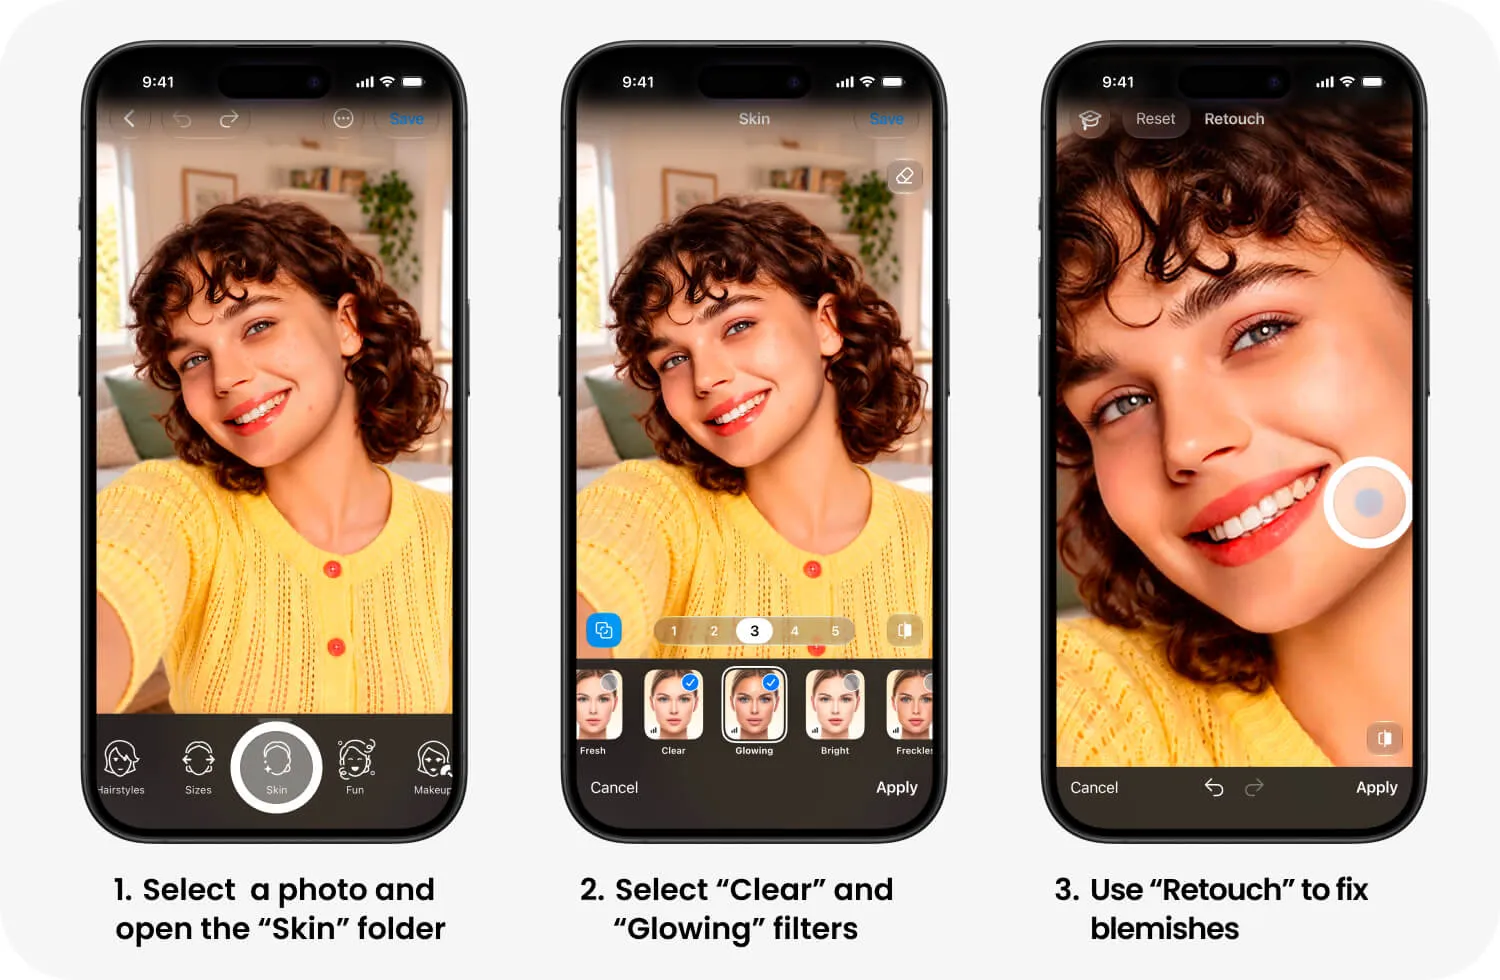
- Open FaceApp and choose a portrait you’d like to edit. It has to detect a human face, even multiple faces. It doesn’t work on anything else. We tried it on dogs; it doesn’t work. Don’t ask us how we know.
- Find the Skin folder in the editing menu.
- Choose your filter. Tap Smooth, Clear, Glowing, or whichever effect catches your eye to preview the results.
- Adjust the intensity. Use the slider to dial the effect up or down until you’re happy with what you see.
- Mix and match. Tap the multiselect icon in the bottom-left corner to combine several Skin filters in one edit.
- Check your handiwork. Compare your edited photo with the original to make sure you haven’t gone overboard, only with a little extra polish.
- Save your photo. Tap Apply to confirm your edits, then save your finished portrait.